How to integrate RouteX with your current CMS?
RouteX CMS Integration makes it easy to sync claim data with your CMS. See our <a href=”/resources/how-to-clear-the-calendar-and-landing-pad-in-routex”>RouteX Calendar guide</a> for internal tips, and review the <a href=”https://www.contentstack.com/docs”>official CMS documentation</a> for best practices.

Matt @AdjusterX
Intro to RouteX Integration with your CMS
What you’ll find in here: In this guide, we’ll dive deep into how AdjusterX integrates RouteX with your Claims Management System (CMS) for a seamless and efficient claims import process. RouteX allows you to automate the import of claims from ExactAnalysis or Symbility, eliminating manual effort and preventing duplication errors. Through CMS integration, users can streamline contact attempts, set appointments automatically, and ensure claim statuses are updated in real-time. This integration optimizes claim management, saving time and improving accuracy. We’ll walk you through the entire process step-by-step and provide solutions to common issues.

RouteX Integration with Your CMS: A Comprehensive Guide
Integrating RouteX with your Claims Management System (CMS) is a powerful way to streamline your claims management process, eliminate manual tasks, and ensure that your claims are imported directly from ExactAnalysis or Symbility. In this guide, we’ll take an in-depth look at how to set up and use the integration, its key features, troubleshooting common issues, and best practices to maximize its value.
By the end of this guide, you’ll understand how RouteX works, the value of automation in claims management, and how to avoid common pitfalls that can slow down your process or lead to duplication of claims.
Benefits of RouteX CMS Integration
- Automates claim imports from ExactAnalysis and Symbility
- Eliminates manual data entry and reduces human error
- Real-time updates on claim statuses with automatic sync every 20 minutes
- Supports carrier-specific tasks, such as auto-contact and auto-appointment logging
- Prevents claim duplication by streamlining the import process
Step-by-Step Setup of RouteX CMS Integration
Here’s how to integrate RouteX with your CMS:
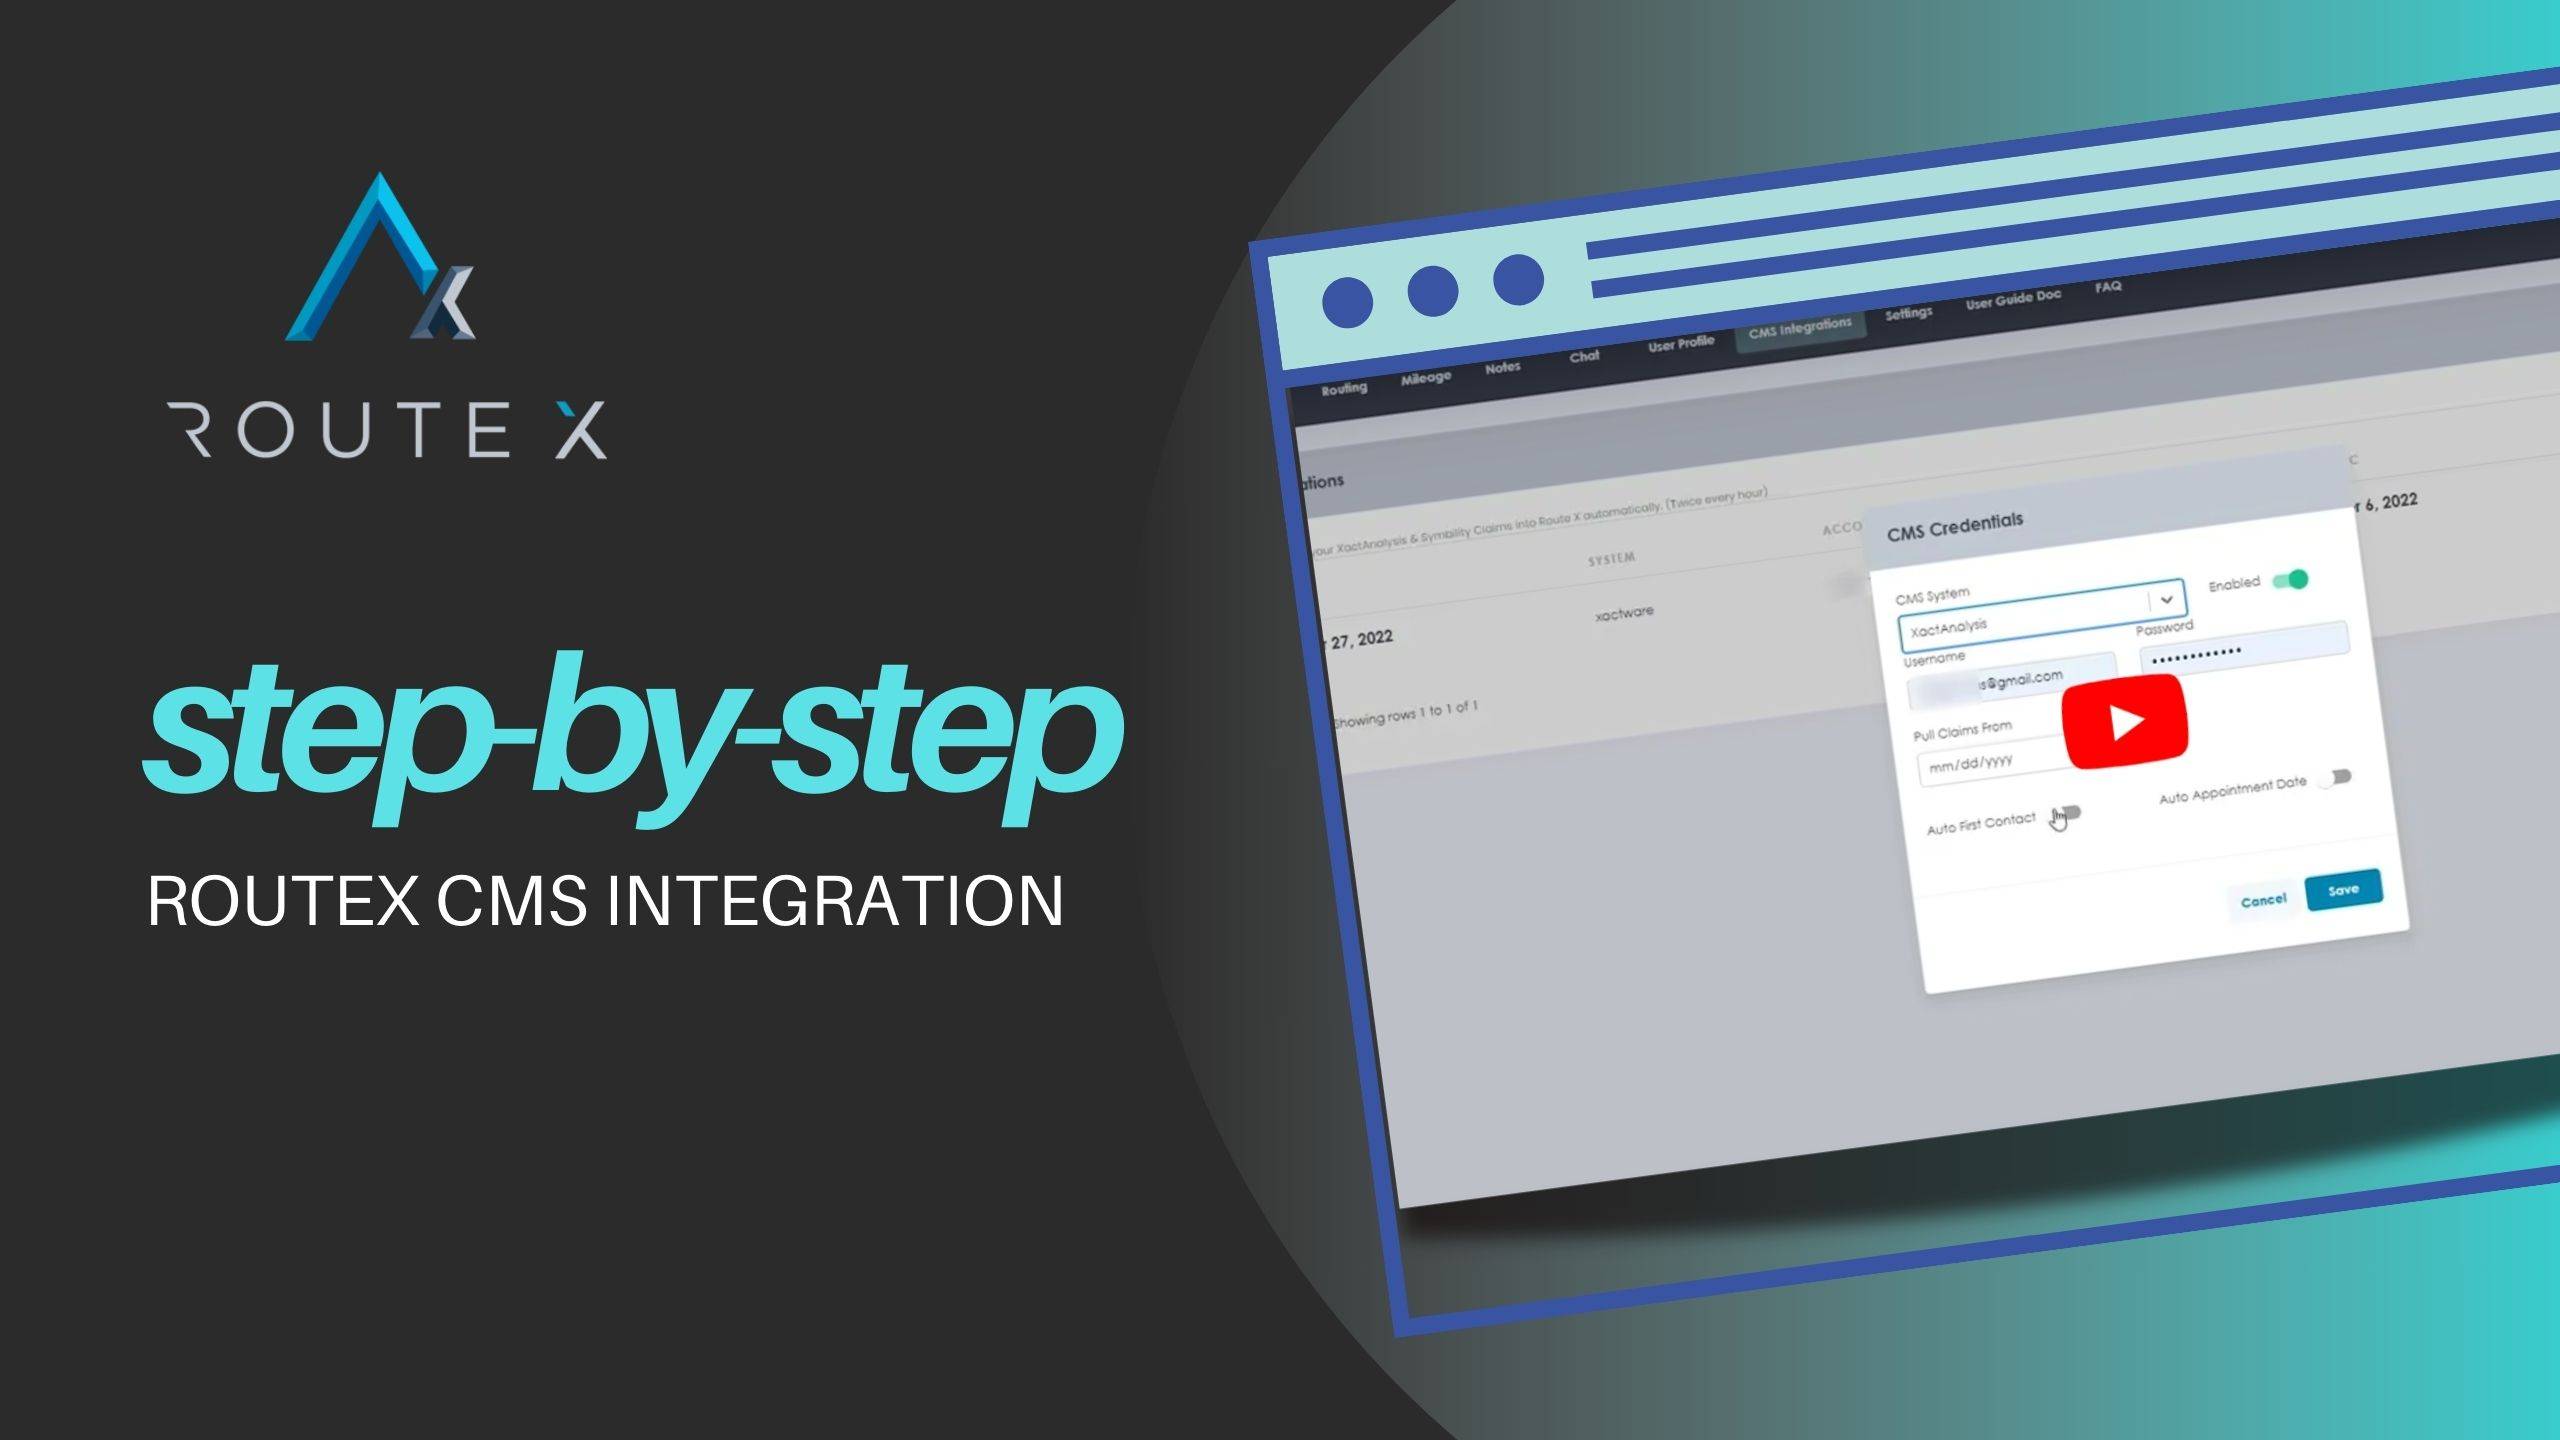
1. Access the CMS Integrations Tab
- Start by logging into your CMS system.
- Navigate to the “CMS Integrations” tab located in your menu.
2. Create a New CMS Integration
Click on “New CMS Integration” to begin setting up the integration.
A window will pop up where you can input your credentials.
3. Input Credentials
You’ll need to enter your ExactAnalysis or Symbility credentials. This includes your username and password for each platform.
This information allows RouteX to connect directly to your external claim systems.
4. Set the Import Date
Specify the date from which you want RouteX to begin pulling claims.
This is important because the system will only import claims with a status of “new” or “open” from this specified date onward.
5. Enable Auto-First Contact and Auto-Appointment Settings
These settings are crucial for users working with carriers that have specific contact and appointment tracking requirements.
Auto-First Contact: When enabled, RouteX will automatically log when an attempt to contact the insured is made.
Auto-Appointment: This feature logs the date and time for the inspection once it’s set.
6. Monitor the Landing Pad
After setting up the credentials and import date, RouteX will begin pulling in claims based on the criteria you’ve set.
All new claims will appear in the Landing Pad, where they await your action.
From here, you can drag them to the calendar to schedule inspections or take further steps.
7. Avoid Manual Imports
One critical step to remember: Do not manually upload claims via Excel if you are using RouteX’s automatic import function. Doing so can result in duplicate claims on the landing pad.
8. Review and Manage Claims
Once claims are imported, you can drag and drop them from the landing pad onto your calendar for scheduling.
RouteX will continuously check your system approximately three times per hour, ensuring that new claims are imported as they come in.
Best Practices for Using RouteX Integration
To ensure smooth and efficient use of RouteX with your CMS, here are some best practices:
- Enable auto-contact and appointment features if working with carriers that require detailed contact logs.
- Avoid mixing manual and automatic claim imports to prevent duplication. If you’ve set up the RouteX integration, rely on it entirely for pulling claims.
- Regularly monitor the landing pad to ensure claims are being imported correctly and timely.
- Check your credentials: Any login issues with ExactAnalysis or Symbility can cause the integration to fail, so make sure these details are accurate.
Troubleshooting Guide
Even the most efficient systems can occasionally run into problems. Here are common issues and how to resolve them:
Problem 1: RouteX isn’t pulling in new claims
Solution: Ensure your credentials for ExactAnalysis or Symbility are entered correctly. If you’ve recently changed your password, you’ll need to update it in RouteX as well. Double-check the date range you’ve specified for claim imports to ensure it covers the period you’re expecting claims from.
Problem 2: Duplicate claims are appearing in the landing pad
Solution: This usually happens if you’ve manually imported claims while the CMS integration is running. Be sure to avoid manual imports once RouteX is set up. Clear any duplicated claims from the landing pad to avoid confusion.
Problem 3: Auto-contact or appointment settings aren’t working
Solution: Check to ensure that both the auto-first contact and auto-appointment features are enabled in your settings. If you’re working with a carrier that requires these features, confirm that their profile is correctly configured to support them.
Problem 4: Claims take too long to appear in the system
Solution: RouteX checks your external claim system every 20 minutes. If a claim hasn’t appeared right away, give it a little time. If you suspect an issue, verify the status in your CMS. If it remains unresolved, recheck the integration settings or contact support.
Frequently Asked Questions (FAQ)
Q1: How does RouteX improve claim management efficiency?
A1: RouteX automates the claim import process from ExactAnalysis and Symbility, removing the need for manual data entry and ensuring that claims are always up-to-date and accurate.
Q2: How often does RouteX sync claims?
A2: RouteX checks for new claims approximately three times per hour. Once a new claim is identified, it’s imported into the CMS and placed on the landing pad.
Q3: What happens if I manually upload claims while using RouteX?
A3: Manually importing claims while using RouteX’s automatic import can cause duplication. It’s best to rely on RouteX exclusively for importing claims to avoid this issue.
Q4: What do the auto-contact and auto-appointment settings do?
A4: These settings allow RouteX to automatically log your first contact attempt with an insured person and set the appointment time for inspections. This is especially useful for carriers that require contact tracking.
Q5: How can I ensure the integration is working properly?
A5: A green status indicator will appear in your CMS when the integration is working correctly. Claims will appear in the landing pad, ready for you to manage. If there are no claims appearing, check your credentials or the start date for claim imports.
Conclusion
RouteX integration with your CMS is a powerful tool that not only automates the claims import process but also helps streamline tasks like first contact and appointment settings. By setting up the integration correctly and following the best practices outlined in this guide, you’ll save time, reduce manual errors, and optimize your claims management workflow. Should any issues arise, the troubleshooting guide and FAQ section will help you resolve them quickly, ensuring that your claims process runs smoothly and efficiently.
Tags :
Share this article :